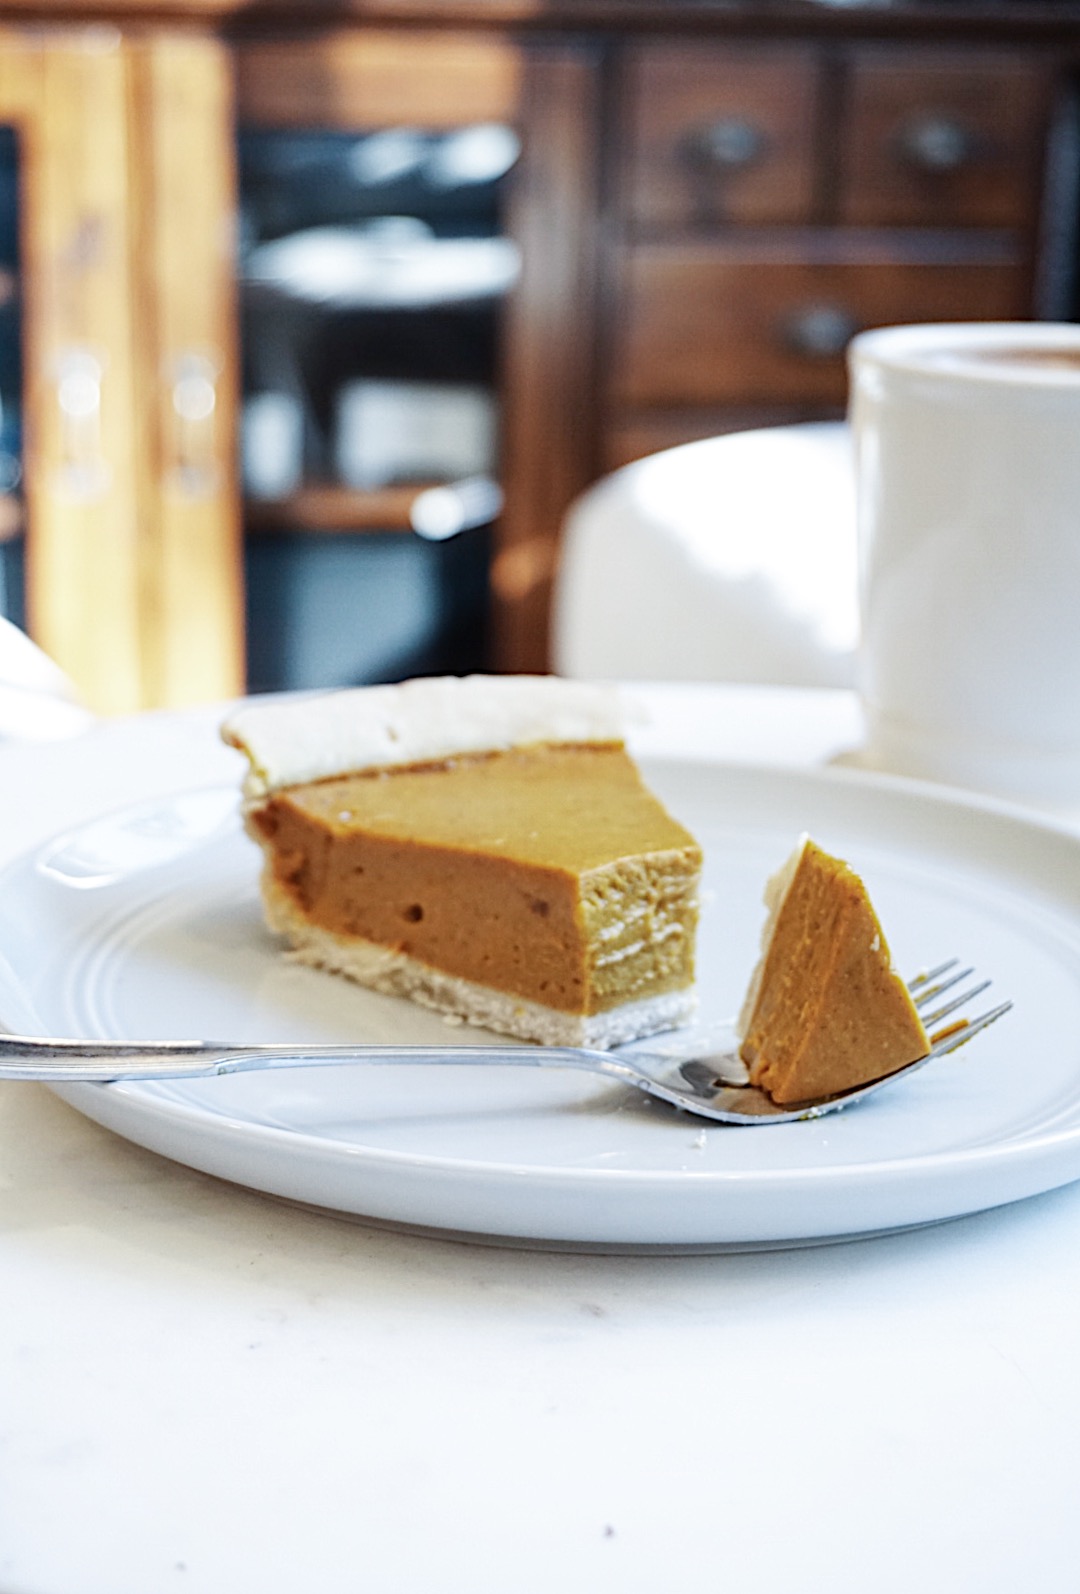
This pumpkin pie is what dreams are made of. I kid you not, before you dismiss it because it’s vegan, gluten-free and paleo, give it a shot. I’ve used Dreena Burton’s pumpkin pie recipe for the past few years and it’s good—the filling is to die for, but the crust just wasn’t meeting my pie crust expectations. I wanted a gluten-free and preferably dairy-free pie crust that was just like (or as close to) the one out of my Mom’s Virginia Cooking Cookbook in which every recipe called for a stick of butter.
Let me preface with, I have never made a pie crust in my life so the fact that I managed to do it tells you that this recipe is approachable and forgiving. If it tears when you’re making it, just push it together and it will turn out great. Going into it, my strategy was to use Dreena’s filling recipe and Back Porch Paleo’s pie crust recipe (they have several variations including a paleo, non-vegan one) that I got off of Otto’s Cassava Flour’s Instagram feed. What I ended up with was a glorious gluten- and soy-free paleo pumpkin pie that had a creamy custard like filling and a buttery flakey crust. Below is exactly what I made, however I think when I make it for Thanksgiving I’ll add a bit of coconut sugar to the crust and/or do half ghee, half coconut oil for some extra flavor, but regardless, this recipe is a winner.
Pumpkin Pie {Paleo with Vegan option}
Crust Ingredients
- 1 egg {or 1 tbsp ground flax seed + 3 tbsp water mixed together}
- 1 cup Otto’s Natural Cassava Flour
- 2 tbsp arrowroot powder + more for dusting
- 1/4 tsp pink himalayan sea salt
- 1/2 cup coconut oil, in solid state {can sub grass-fed butter or ghee}
- 1/4 cup room temp water
Crust Direction {for a filled pie}
- Pre-heat oven to 400 degrees.
- If you are using a flax egg mix ground flax and water together in a separate bowl and set aside.
- If you’re using an egg, whisk it in a separate bowl and set aside.
- Mix together cassava flour, arrowroot, and salt in a medium mixing bowl.
- Drop pieces of coconut oil into the bowl with the flour and with a pastry cutter (all I had was a potato masher), blend into dry ingredients until it is incorporated and even and resembles coarse clumps. When you cook the pie crust, these little clumps will melt and help your keep your crust moist and flakey.
- Pour flax egg or whisked egg into fat/flour mixture and work together with your hands or a wooden spoon until it again, resembles a course crumb-like mixture.
- Add water and work into mixture with a wood spoon. The goal is to be able to touch the dough and not have it stick to your fingers so that you can form into into a ball.
- Lay down one sheet of parchment paper and dust it with some arrowroot powder, place your dough ball in the center and flatten slightly into a disc, then dust with more arrowroot.
- Place a second sheet of parchment paper over it and roll into out into a large circle that is ~1/4″ thick.
- Once it’s the size you need for your pie plate, remove top sheet of parchment and place pie plate upside down on top. Carefully flip the crust on top of the pie plate.
- Remove the parchment, fix any tears that may have happened in the process of flipping, and finish the crust edge to your liking.
- Fill with pumpkin pie filling and bake at 400 degrees for 10 minutes, then reduce heat to 350 degrees and continue to bake for 25–40 minutes until the pie is golden and has mostly set. The center may be soft, but will continue to set as it cools.
- Let cool completely before serving. I like to refrigerate it for 20 minutes or so after it cools to make sure it really sets—you don’t want your filling to spill out!
Filling Ingredients
- 1 15oz can pumpkin puree {not pumpkin pie filling}
- 3/4 cup cashews
- 1/3 cup unsweetened nut milk
- 1/2 cup + 1 tbsp maple syrup
- 2 tsp fresh lemon juice
- 1 tbsp arrowroot powder
- 1 1/2 tsp cinnamon
- 1/4 tsp nutmeg
- 1/4 tsp allspice
- pinch ground cloves
- 1/2 tsp vanilla extract
- 1/4 tsp pink Himalayan sea salt
Filling Directions
- Combine all ingredients in a high speed blender and blend on high until smooth.
- Pour into pie crust.
- Bake at 400 degrees for 10 minutes, then reduce heat to 350 degree and bake for another 25 minutes or until the pie is slightly golden and mostly set.
- Let cool completely before serving. I like to refrigerate it for 20 minutes or so after it cools to make sure it really sets—you don’t want your filling to spill out!
I’d gather this pie is good covered in the fridge for up to 5 days, but tbh, it never lasts that long. It’s too good!
xx
-S